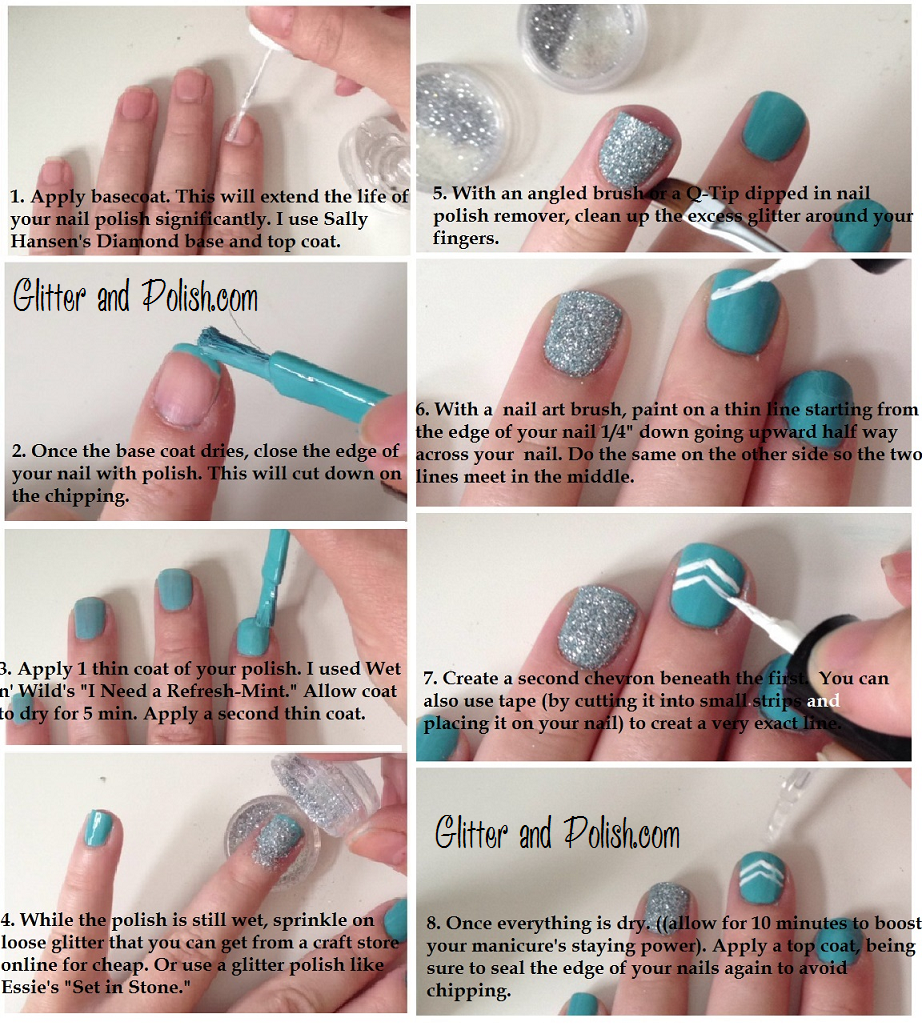
In this tutorial I will show you how to do a simple chevron nail design with a glitter accent that is so cute and fun to show off.
Step 1. Apply basecoat. This will extend the life of your nail polish significantly. I used Sally Hansen’s “Diamond” base and top coat.
Step. 2. Once the base coat dries, close the edge of your nail with polish. This will cut down on the chipping.
Step. 3. Apply one thin coat of your polish. I used “Wet N’ Wild’s “I Need a Refresh Mint” Allow coat to dry for 5 min. Apply a second thin coat.
Step. 4. While the polish is still wet, sprinkle on loose glitter that you can get from a craft store online for cheap. Or use a glitter polish like Essie’s “Set in Stone”.
Step 5. With an angled brush or a cotton swab dipped in polish remover, clean up the excess glitter around your fingers.
Step 6. With a nail art brush, paint a thin line starting away from the edge of your nail 1/4″ down going upward half way across your nail. Do the same on the other side so the two lines meet in the middle.
Step 7. Create a second chevron beneath the first. You can also use tape (by cutting into small strips and placing it on your nail) to create a very exact line.


