
Jack Skellington Nail Tutorial
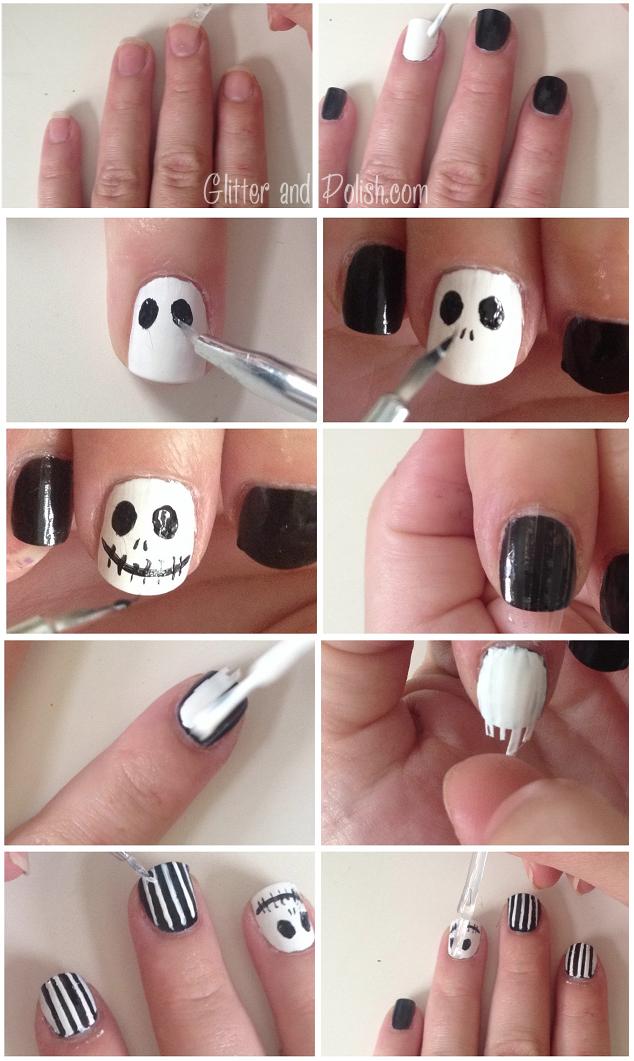
1) Prep your nail as always with a base coat and seal the edges of your nails.
2) Apply a thin coat of white polish to the ring finger and a thin coat of black to the rest. I used Sally Hansen Xtreme Wear in both cases. Once the first coat is dry, apply a second thin layer.
3) On your ring finger, use a detail brush or the rounded end of a bobby pin to create two oblong circles toward the base of your nail. They should flare out slightly toward the edges of your nails. Start with a small oval and gradually build it into larger ovals.
4) With the tip of a detail brush or a tooth pick, create two short vertical slits for the nostrils.
5) With the same detail brush, drag a circular line across the tip of your nail for the smile. If you mess up, you can always go back in with the white and clean up some of the mistakes. Add short vertical lines through the smile.
6-8) For these steps, I took pictures of two different ways to do the stripes depending on what you think you’ll be best at. You can either cut thin strips of tape and place on your nail (the polish has to be completely dry for this to work). Then you can paint white over the whole nail and gently remove the tape. This will give you clean lines and you don’t have to have a steady hand.
9) You can also use the detail brush again to create the lines like I’ve shown on my middle finger in this step. You can always go back in and clean up edges using the black polish.
10) Finish with a top coat!


