
Halloween is not until next month, and although it’s a bit early, I just can’t wait and want to share this with you now!
In this tutorial I’ll show you how to make these super cute jack-o-lantern nails with dotted tips.
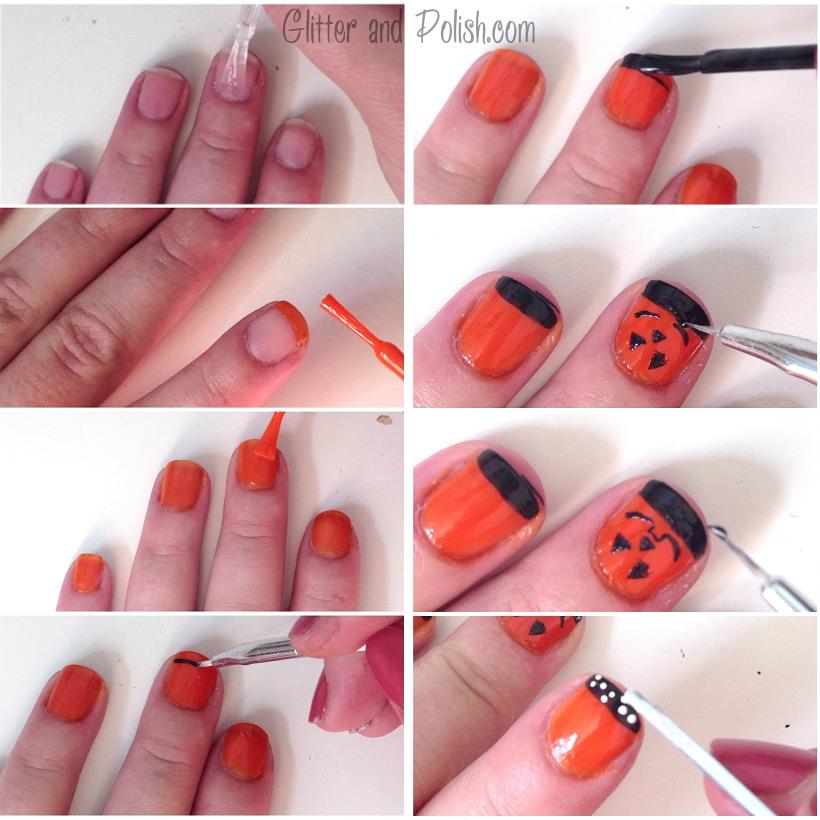
1) Start with a base coat and make sure to seal the edges of your nails to make the manicure last.
2) Seal the edge of your nail again with the orange polish. I used Wet N’ Wild’s “Cursed.”
3) Coat nails with a thin coat of polish. Apply second coat after first coat dries.
4) With a thin detail brush, apply a thin stripe of black polish. If you don’t have a thin brush, use a piece of tape against your nail so that you can use the normal black polish brush to create the french tip.
5) Fill in the french tip with the black polish.
6) With the detail brush, draw on the outline of 2 triangles close to the base of your nail. Draw a third one below and between the two. It will be easier if the polish is thin. Underneath the nose, draw two semi-circles.
7) Between the two semi-circles, draw two vertical lines and then connect them with a horizontal line on top. This will finish the mouth.
8) I used the end of a bobby pin to create the white polka-dots. The rounded edge of the pin works well for small dots. Finish with a top coat once everything else is dry.
Enjoy!


